This is a quick guide to Agiblocks Consultants on how to implement the Broker Statement Upload for a customer.
Create a Relation of Type Broker
The first step is to ensure at least one Relation of type Broker exists. This is managed under the Relations tile on the Home screen.
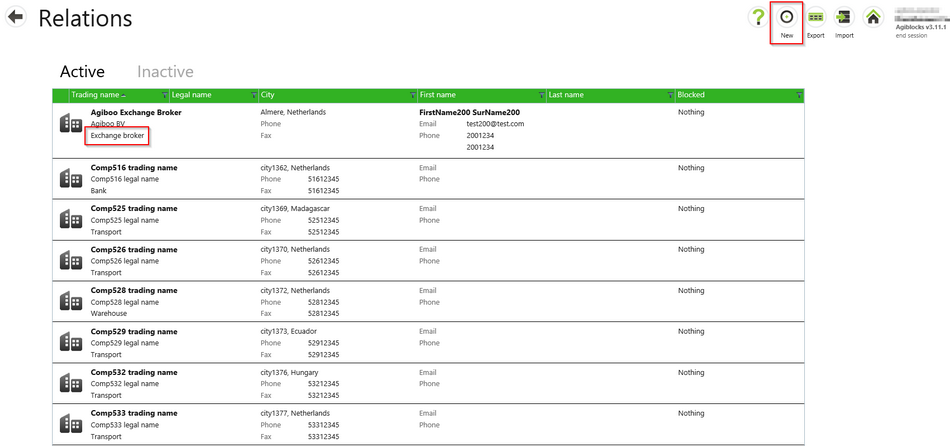
It needs to be of type Exchange Broker to appear in the list of Brokers from which a statement can be uploaded. (There is also type Commodity Broker - these do not appear in that list).
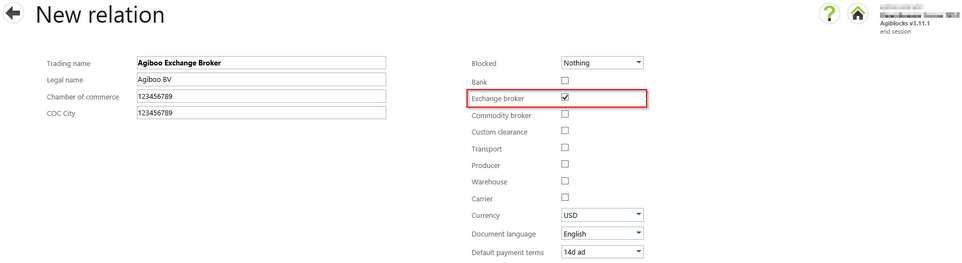
If a new broker needs to be added, ensure that the “Exchange Broker” box is ticked.
Matching Tag - Important Not to Forget!
On the Settings, Configuration, Risk, Future instruments screen, the matching tags must be entered.
Take the following example for the Sugar market:
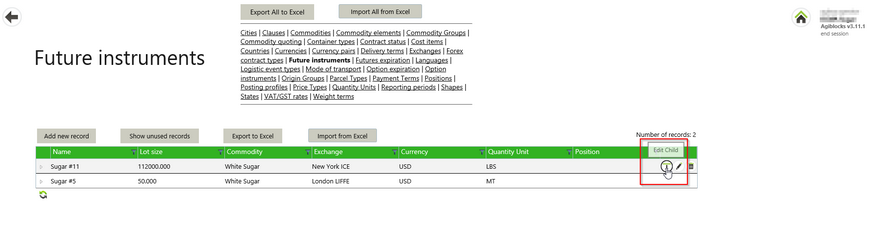
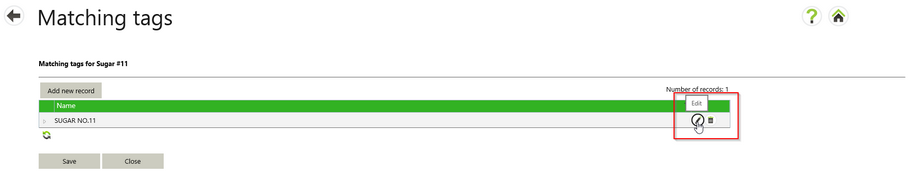
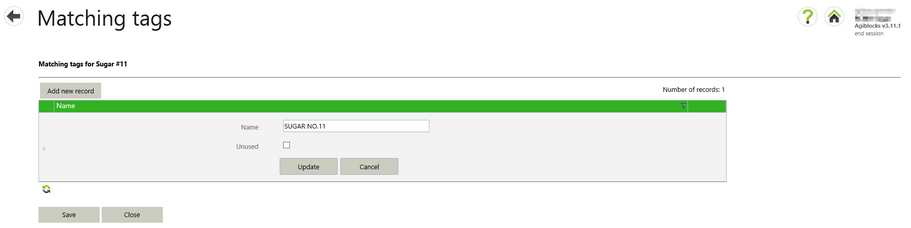
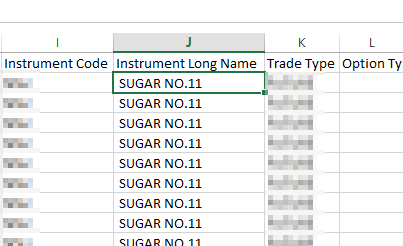
This specific matching tag is used to associate with the Instrument Long Name field on the Broker Statement.
Format
The customer needs to contact their broker to request that the broker formats the statement for correct import into Agiblocks. The following formats are accepted:
Format 1
Header:
File,Latest Run Date,Trade Status,Trade Date,Entry Date,Ledger Code,Ledger Name,Market Code,Instrument Code,Instrument Long Name,Trade Type,Option Type,Delivery/Prompt Date,Buy/Sell (Cleared),RANsys Serial Number,Currency Code,Charge Currency,Lot Size,LME Session Code,Volume,Price,Strike,Net Charges (sum),Net Lots (Cleared);
Example row:
TRADES,23/01/2015,INS,23/01/2015,23/01/2015,7793,(Customer name),CSCE,NSU,SUGAR NO.11,FUTURE,,31-Mar-15,Buy,5012314HC,USD,USD,112000,,1,15.37,,-5.52,3;
On the statement:

All columns must be present. Data is mandatory in the following columns:
Price,Curency_Code,Trade_Date,Delivery_Prompt_Date,Instrument_Long_Name,Buy_Sell_Cleared,Volume;
The date format for Trade_Date and Delivery_Prompt_Date should the same: DD/MM/YY, where M = month, D = day, Y = year;
Format 2
Header:
Source_Account;Trade_Date;Value_Date;Long;Short;Contract_Description;Price;Ccy;Ex_Broker;Comment;
Example row:
NE,16/07/2015,16/07/2015,,40,MAR 16 SUGAR # 11,17.25,USD,BR,COM;
On the statement:

All columns must be present. Data is mandatory in the following columns:
Trade_Date,Short,Long,Contract_Description,Price,Ccy;
Upload a Broker Statement
To upload a broker statement:
• Click the Futures tile on the Home screen.
• Click the Upload broker statement button.
• Select a Broker company if defined.
• Click Select to open an upload screen.
• Select and upload the broker statement.
• The system provides a message whether the upload has been done successfully or not.
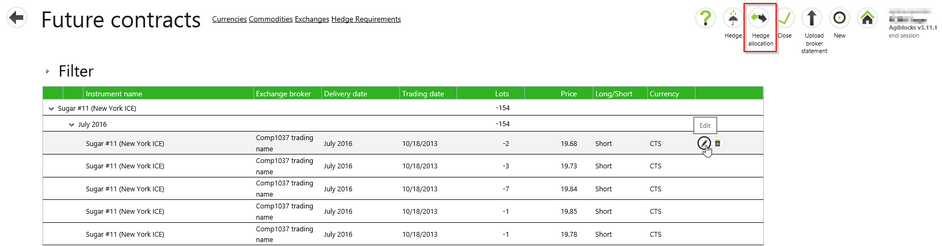
• When the upload was successful, the Future contracts will be visible in the main screen.
Delete Uploaded Broker Statement
It is possible to delete an uploaded broker statement. Each upload is recorded along with the futures created. A new permission called “Manage futures upload” controls access to a button on the existing Upload page. This leads to a new screen which lists previous uploads. Each row has a Delete button which deletes the upload and the related futures. If a delete fails (e.g. due to dependencies) it will show an error above the list. The functionality only applies to new uploads, not to older uploads.
Note: The delete of the upload cannot be undone! It will be the user’s responsibility to not delete futures traded in closed financial periods.
